आउटलुक में दो/एकाधिक कैलेंडर में अपॉइंटमेंट कैसे जोड़ें?
सामान्य तौर पर, एक नई नियुक्ति आउटलुक में वर्तमान में खुलने वाले कैलेंडर में सहेजी जाएगी। लेकिन अब, आप किसी अपॉइंटमेंट को अपने कैलेंडर और सार्वजनिक कैलेंडर में सहेजना चाहते हैं, कोई विचार? यह आलेख दो या एकाधिक कैलेंडर में आसानी से अपॉइंटमेंट जोड़ने के लिए दो समाधान पेश करेगा।
- मेरे कैलेंडर में कॉपी करें सुविधा के साथ दो कैलेंडर में अपॉइंटमेंट जोड़ें
- हॉटकी के साथ दो/एकाधिक कैलेंडर में अपॉइंटमेंट जोड़ें
मेरे कैलेंडर में कॉपी करें सुविधा के साथ दो कैलेंडर में अपॉइंटमेंट जोड़ें
यदि आप डिफ़ॉल्ट कैलेंडर और किसी अन्य गैर-डिफ़ॉल्ट कैलेंडर में अपॉइंटमेंट जोड़ने जा रहे हैं, तो आप इसे लागू कर सकते हैं मेरे कैलेंडर में कॉपी करें इसे आसानी से प्राप्त करने की सुविधा।
1. में कैलेंडर देखें, गैर-डिफ़ॉल्ट कैलेंडर खोलें जिसमें आप अपॉइंटमेंट जोड़ेंगे और क्लिक करें होम > नव नियुक्ति नई नियुक्ति बनाने के लिए.
2. अब अपॉइंटमेंट विंडो खुलती है। अपनी आवश्यकतानुसार अपॉइंटमेंट लिखें और दबाकर अपॉइंटमेंट सहेजें कंट्रोल + S कुंजियाँ एक साथ (या क्लिक करके)। सहेजें पर बटन त्वरित एक्सेस टूलबार).
3. क्लिक करने के लिए आगे बढ़ें नियुक्ति > मेरे कैलेंडर में कॉपी करें.

और अब नई नियुक्ति को वर्तमान में खुलने वाले कैलेंडर और डिफ़ॉल्ट कैलेंडर में जोड़ दिया गया है। स्क्रीनशॉट देखें:

नोट: यदि आपने पहले से ही गैर-डिफ़ॉल्ट कैलेंडर में अपॉइंटमेंट बना लिया है, तो कृपया इसे खोलने के लिए डबल क्लिक करें और फिर क्लिक करें नियुक्ति > मेरे कैलेंडर में कॉपी करें इसे डिफ़ॉल्ट कैलेंडर में जोड़ने के लिए.
आउटलुक में प्रत्येक ईमेल को निर्दिष्ट प्राप्तकर्ता को स्वचालित रूप से अग्रेषित करें
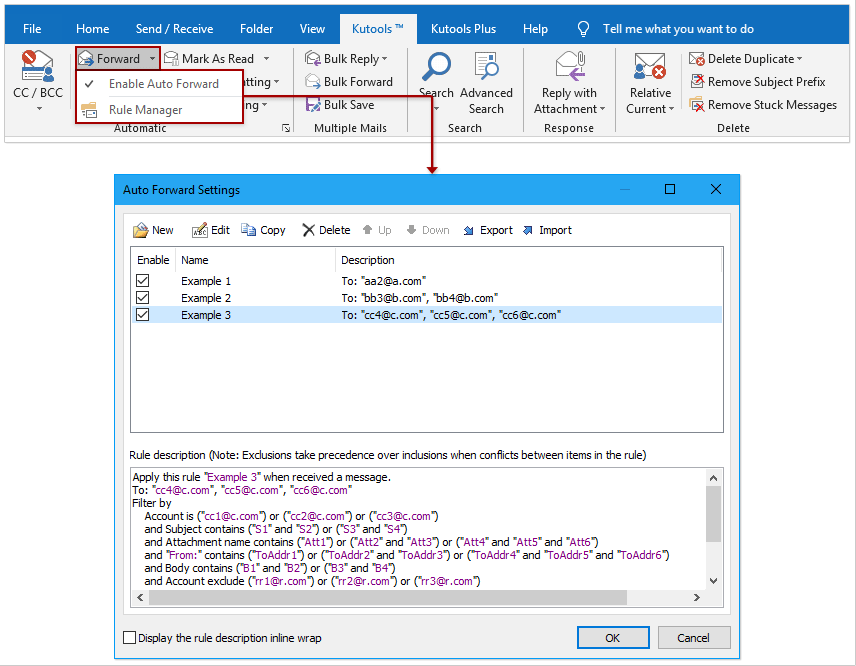
सामान्यतया, हम निर्दिष्ट प्राप्तकर्ताओं को स्वचालित रूप से ईमेल अग्रेषित करने के लिए एक नियम निर्धारित कर सकते हैं, जैसे कि आपका अन्य ईमेल खाता, आपका जीमेल, या आपके सहकर्मी, आदि। लेकिन, हम सभी जानते हैं कि एक कस्टम नियम को कॉन्फ़िगर करने में लंबा समय लगेगा। आउटलुक। अब, हम आउटलुक के लिए कुटूल पेश करते हैं (स्वचालित) आगे सुविधा, जो केवल कई क्लिक के साथ एक ऑटो फ़ॉरवर्डिंग नियम सेट कर सकती है।

हॉटकी के साथ दो/एकाधिक कैलेंडर में अपॉइंटमेंट जोड़ें
यदि आप दो या एकाधिक गैर-डिफ़ॉल्ट कैलेंडर में अपॉइंटमेंट जोड़ना चाहते हैं, तो आप इसकी सहायता से ऐसा कर सकते हैं कंट्रोल कुंजी।
1. में कैलेंडर देखें, नई अपॉइंटमेंट बनाएं, सहेजें और बंद करें, या मौजूदा अपॉइंटमेंट का चयन करने के लिए क्लिक करें।
2। होल्डिंग को कंट्रोल कुंजी, चयनित अपॉइंटमेंट को तब तक खींचें और छोड़ें जब तक कि गंतव्य कैलेंडर पर हाइलाइट न हो जाए नेविगेशन फलक. स्क्रीनशॉट देखें:

अब अपॉइंटमेंट को गंतव्य कैलेंडर में कॉपी कर लिया गया है जैसा कि नीचे स्क्रीनशॉट में दिखाया गया है।

3. अपनी आवश्यकतानुसार अपॉइंटमेंट को अन्य कैलेंडर में कॉपी करने के लिए उपरोक्त चरण 2 को दोहराएँ।
संबंधित आलेख
सर्वोत्तम कार्यालय उत्पादकता उपकरण
आउटलुक के लिए कुटूल - आपके आउटलुक को सुपरचार्ज करने के लिए 100 से अधिक शक्तिशाली सुविधाएँ
🤖 एआई मेल सहायक: एआई जादू के साथ त्वरित प्रो ईमेल - प्रतिभाशाली उत्तरों के लिए एक-क्लिक, सही टोन, बहुभाषी महारत। ईमेलिंग को सहजता से रूपांतरित करें! ...
📧 ईमेल स्वचालन: कार्यालय से बाहर (POP और IMAP के लिए उपलब्ध) / ईमेल भेजने का शेड्यूल करें / ईमेल भेजते समय नियमों के अनुसार ऑटो सीसी/बीसीसी / स्वतः अग्रेषित (उन्नत नियम) / स्वतः ग्रीटिंग जोड़ें / बहु-प्राप्तकर्ता ईमेल को स्वचालित रूप से अलग-अलग संदेशों में विभाजित करें ...
📨 ईमेल प्रबंधन: आसानी से ईमेल याद रखें / विषयों और अन्य लोगों द्वारा घोटाले वाले ईमेल को ब्लॉक करें / डुप्लिकेट ईमेल हटाएँ / उन्नत खोज / फ़ोल्डरों को समेकित करें ...
📁 अनुलग्नक प्रो: बैच सहेजें / बैच अलग करना / बैच संपीड़न / ऑटो सहेजें / ऑटो डिटैच / ऑटो कंप्रेस ...
🌟 इंटरफ़ेस जादू: 😊अधिक सुंदर और शानदार इमोजी / टैब्ड व्यू के साथ अपनी आउटलुक उत्पादकता बढ़ाएँ / आउटलुक को बंद करने के बजाय छोटा करें ...
???? एक-क्लिक चमत्कार: आने वाले अनुलग्नकों के साथ सभी को उत्तर दें / फ़िशिंग-रोधी ईमेल / 🕘प्रेषक का समय क्षेत्र दिखाएं ...
👩🏼🤝👩🏻 संपर्क एवं कैलेंडर: बैच चयनित ईमेल से संपर्क जोड़ें / किसी संपर्क समूह को अलग-अलग समूहों में विभाजित करें / जन्मदिन अनुस्मारक हटाएँ ...
के ऊपर 100 सुविधाएँ आपके अन्वेषण की प्रतीक्षा करें! अधिक जानने के लिए यहां क्लिक करें।

