Remove Page Breaks from Selection or Whole Document: A Step-by-Step Guide
Removing page breaks in a Word document can streamline the layout and improve document readability. Whether you're working with manually inserted or automatic page breaks, this guide covers several methods to remove them efficiently from selected parts of your document or the entire file.
Remove page breaks one by one manually
Batch remove all page breaks in a selection or the whole document
Remove or stop automatic page breaks
Remove page breaks one by one manually
If you need to remove a few specific page breaks, doing so manually is straightforward:
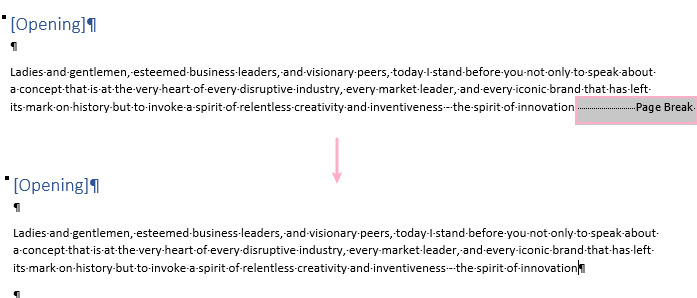
Step 1. Show the page breaks (Generally, page breaks are hidden)
पर नेविगेट करें होम टैब, और पर क्लिक करें Show/Hide Editing Mark ¶ button to display all formatting marks, including page breaks.

Step 2. Remove page breaks
Scroll to the page break you want to remove. Select the page break line and delete it by pressing the Delete or Backspace कुंजीपटल पर कुंजी
It is easy to use the above way to remove a page break in word, but how to remove dozens of page breaks? It is feasible to press the Ctrl key to select all page breaks and then press Delete key, but it seems time-consuming if the document has more than 100 pages.
ऑफिस टैब: वर्ड, एक्सेल, पॉवरपॉइंट में टैब्ड इंटरफेस लाता है... |
|
अब अपना वर्कफ़्लो बढ़ाएँ। विस्तार में पढ़ें मुफ्त डाउनलोड
|
Batch remove all page breaks in a selection or the whole document
To remove multiple page breaks from a selected area or the entire document, you can use one of two effective methods.
Using the Find and Replace feature
To remove multiple page breaks simultaneously, you can use the Find and Replace function:
Step 1. Select the contents you want to remove page breaks
If you do not select any content, the ढूँढें और बदलें feature will work for the entire document
Step 2. Enable the Find and Replace feature
दबाएँ Ctrl + H को खोलने के लिए ढूँढें और बदलें संवाद बॉक्स।
Step 3. Set the Find what and Replace with fields
-
में क्या ढूंढें: क्षेत्र प्रकार ^m (Or click अधिक>> button to show more options, and choose मैनुअल पेज ब्रेक में विशिष्ट dropdown) to search for manual page breaks.
-
छुट्टी साथ बदलें: मैदान खाली।
-
क्लिक करें सभी को बदलें to remove all page breaks from your selected text or the entire document if no specific selection is made.

Now, all page breaks are removed.
Using Kutools for Word’s Remove Page Breaks
- वर्ड के लिए कुटूल, संपूर्ण पृष्ठ विराम या किसी दस्तावेज़ के चयन को हटाना इतना आसान कभी नहीं रहा।
पर जाए कुटूल टैब पर क्लिक करें तोड़ता dropdown in the हटाना समूह बनाएं, और क्लिक करें पेज ब्रेक हटाएँ.

वर्ड के लिए अनुशंसित उत्पादकता उपकरण
वर्ड के लिए कुटूल: एआई को एकीकृत करना 🤖, 100 से अधिक उन्नत सुविधाएँ आपके दस्तावेज़ प्रबंधन समय का 50% बचाती हैं।मुफ्त डाउनलोड
कार्यालय टैब: बहु-दस्तावेज़ नेविगेशन को सरल बनाते हुए, Word (और अन्य Office टूल) में ब्राउज़र-जैसे टैब का परिचय देता है।मुफ्त डाउनलोड
Remove or stop automatic page breaks
If the page breaks are inserted by the Paragraph settings, neither of the above methods can remove them. To remove such page breaks, follow the steps bellow:
Step 1. Press Ctrl + A keys to select the whole document
Step 2. Right-click to choose Paragraph from the context menu
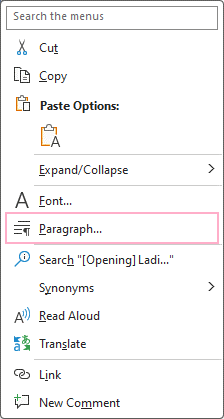
Step 3. Untick Page break before checkbox
के अंतर्गत लाइन और पेज ब्रेक में टैब पैरा dialog, untick पहले पेज ब्रेक चेकबॉक्स, फिर क्लिक करें OK.

Then all automatic page breaks are removed.
Understanding how to effectively remove page breaks can help maintain the aesthetic and functional integrity of your documents. Whether you choose manual deletion, batch processing through Find and Replace, or utilizing tools like Kutools, each method provides a way to achieve a cleaner, more professional document layout.
अतिरिक्त परिवर्तनकारी वर्ड रणनीतियों के लिए जो आपके डेटा प्रबंधन को महत्वपूर्ण रूप से बढ़ा सकती हैं, यहां आगे जानें..
सर्वोत्तम कार्यालय उत्पादकता उपकरण
वर्ड के लिए कुटूल - ओवर के साथ अपने शब्द अनुभव को उन्नत करें 100 उल्लेखनीय विशेषताएं!
🤖 कुटूल्स एआई असिस्टेंट: एआई के साथ अपना लेखन बदलें - सामग्री उत्पन्न करें / पाठ पुनः लिखें / दस्तावेज़ों को सारांशित करें / जानकारी के लिए पूछताछ करें दस्तावेज़ पर आधारित, सभी वर्ड के भीतर
📘 दस्तावेज़ महारत: पन्ने विभाजित करें / दस्तावेज़ मर्ज करें / विभिन्न प्रारूपों में निर्यात चयन (पीडीएफ/टीएक्सटी/डीओसी/एचटीएमएल...) / बैच को पीडीएफ में कनवर्ट करें / पेजों को छवियों के रूप में निर्यात करें / एक साथ अनेक फ़ाइलें प्रिंट करें...
✏ सामग्री संपादन: बैच ढूंढें और बदलें अनेक फ़ाइलों में / सभी चित्रों का आकार बदलें / तालिका पंक्तियों और स्तंभों को स्थानांतरित करें / तालिका को पाठ में बदलें...
🧹 सहज स्वच्छ: साफ़ कर दो अतिरिक्त स्थान / अनुभाग टूट जाता है / सभी शीर्षलेख / पाठ बक्से / हाइपरलिंक / अधिक हटाने वाले टूल के लिए, यहां जाएं समूह हटाएँ...
➕ रचनात्मक निवेशन: डालें हजार विभाजक / चेक बॉक्स / रेडियो बटन / क्यूआर कोड / बारकोड / विकर्ण रेखा तालिका / समीकरण कैप्शन / तस्वीर का शीर्षक / सारणी का शीर्षक / एकाधिक चित्र / में और अधिक खोजें समूह सम्मिलित करें...
🔍 परिशुद्धता चयन: सटीक विशिष्ट पृष्ठ / टेबल्स / आकृतियाँ / शीर्षक पैराग्राफ / के साथ नेविगेशन बढ़ाएँ अधिक सुविधाएँ चुनें...
⭐ स्टार संवर्द्धन: किसी भी स्थान पर नेविगेट करें / दोहरावदार पाठ स्वतः सम्मिलित करें / दस्तावेज़ विंडोज़ के बीच टॉगल करें / 11 रूपांतरण उपकरण...
